CentOS7 安装 Nginx 及多站点和反向代理配置
目录
CentOS7 安装 Nginx 及多站点和反向代理配置
1 Nginx 安装
centos7 官方 yum 源并没有提供 Nginx 的安装包
可用的安装方式有三:
- 编译安装
- 通过 EPEL 源进行安装
- 通过 Nginx 厂商 yum 源安装(本例采用此方法),参考
具体步骤如下:
-
添加厂商 yum 源
-
1
2
3
4
cd /etc/yum.repos.d ls nano nginx.repo # 写入如下内容 -
1
2
3
4
5
[nginx] name=nginx repo baseurl=https://nginx.org/packages/centos/$releasever/$basearch/ gpgcheck=0 enabled=0
-
-
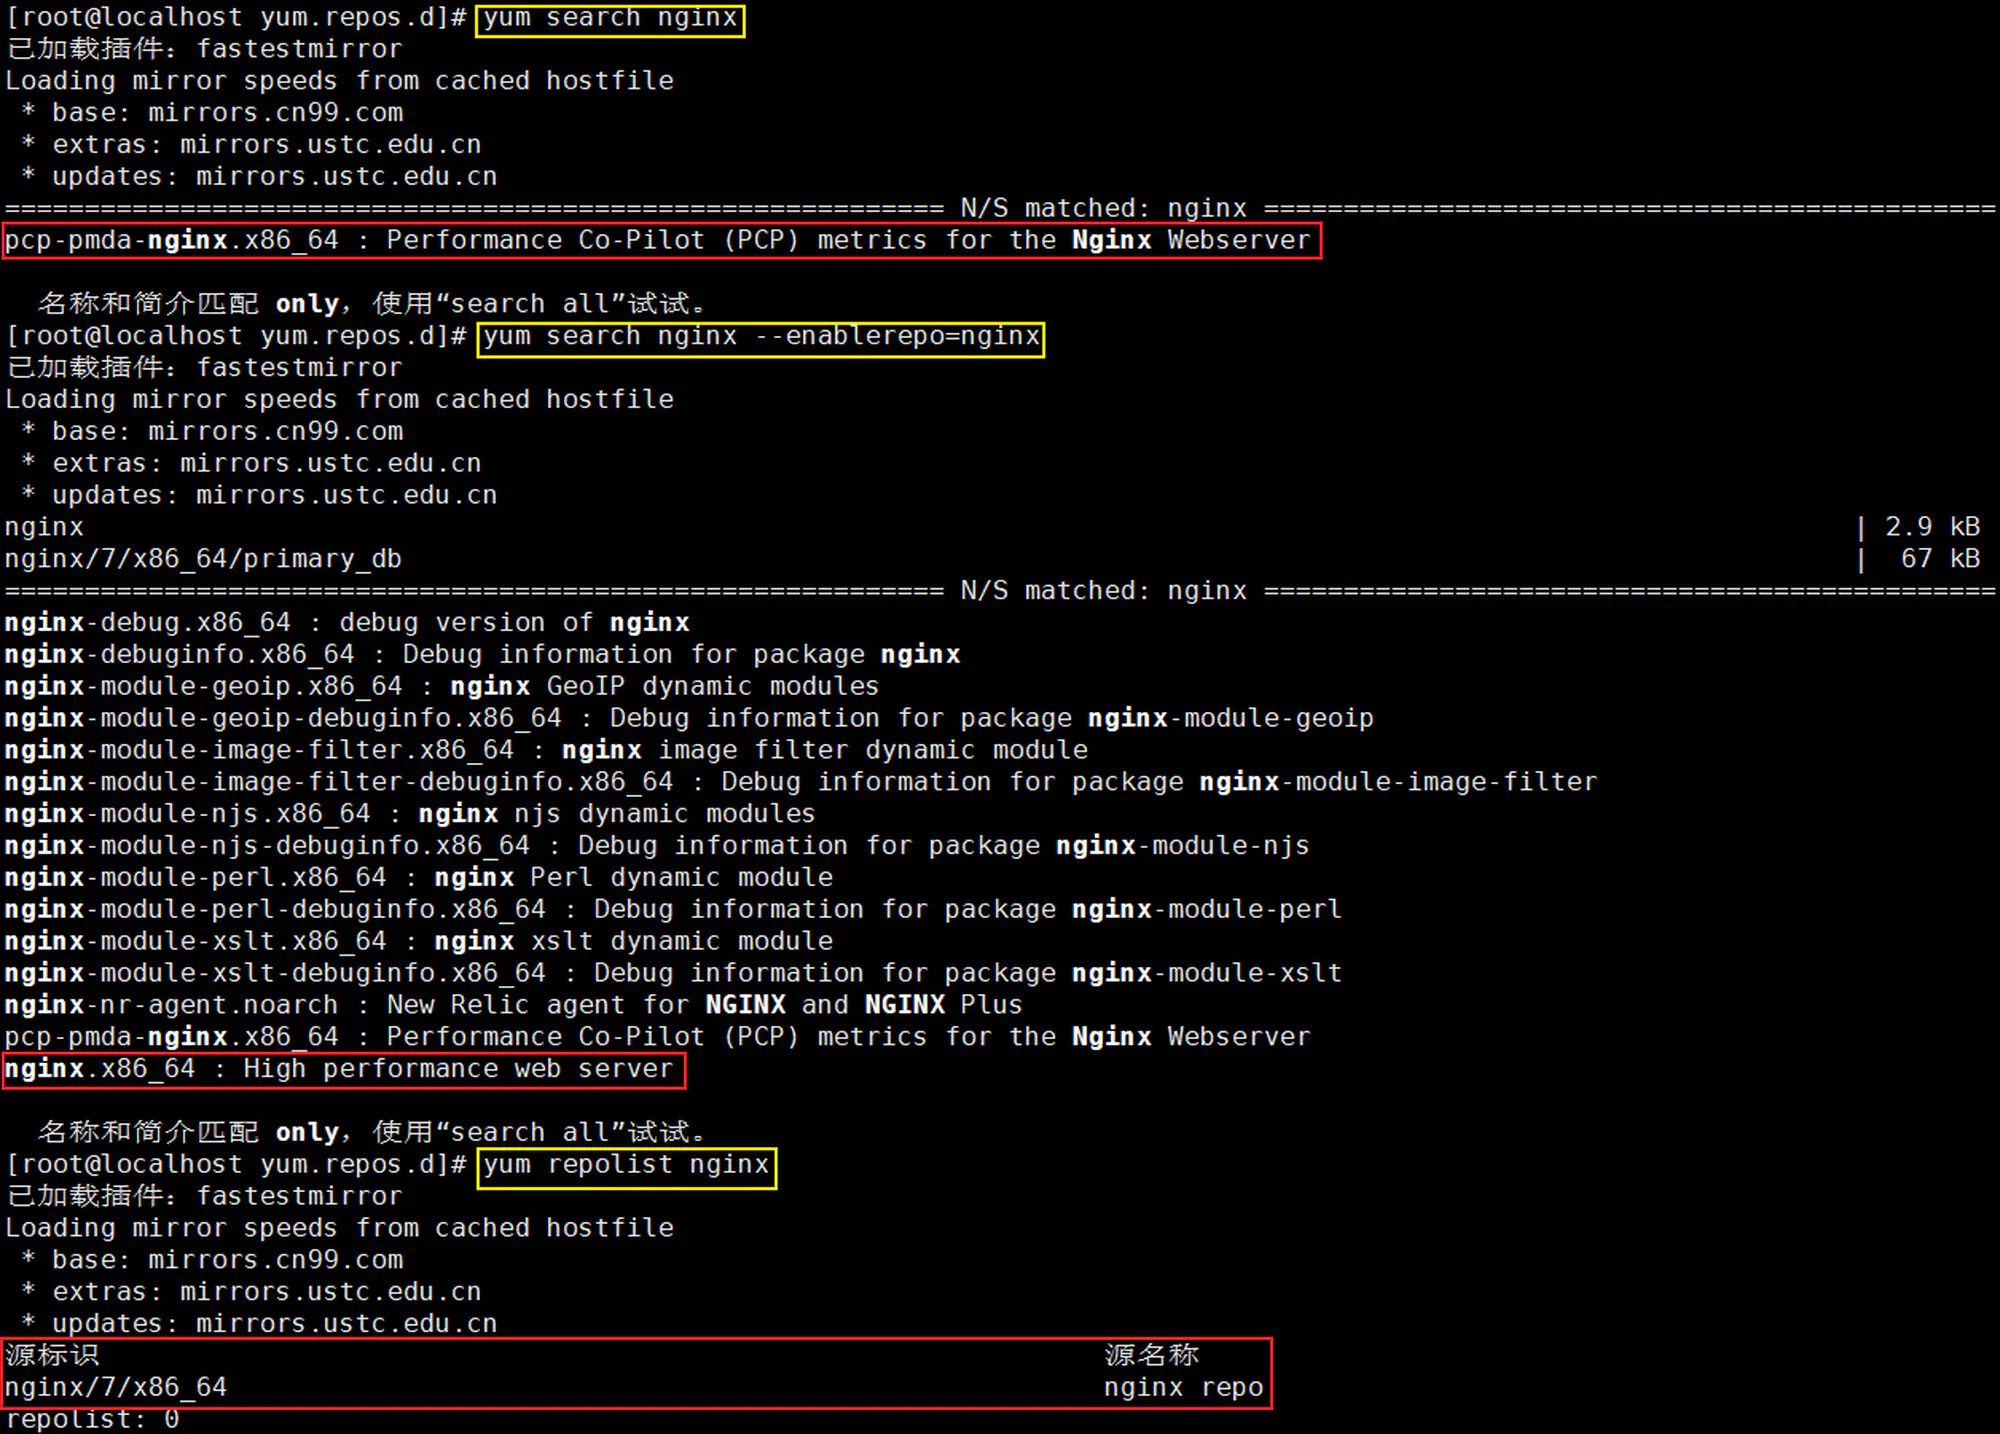
验证,安装
-

1 -
1
2
3
4
5
6
7
8
#安装 yum install nginx --enablerepo=nginx #启动 systemctl status nginx systemctl enable nginx systemctl start nginx systemctl status nginx
-
-
防火墙设置,浏览器访问
-
1
2
3
4
5
6
7
8
#防火墙设置 firewall-cmd --list-all firewall-cmd --add-service=http firewall-cmd --add-service=https firewall-cmd --list-all firewall-cmd --runtime-to-permanent systemctl restart firewalld firewall-cmd --list-all -
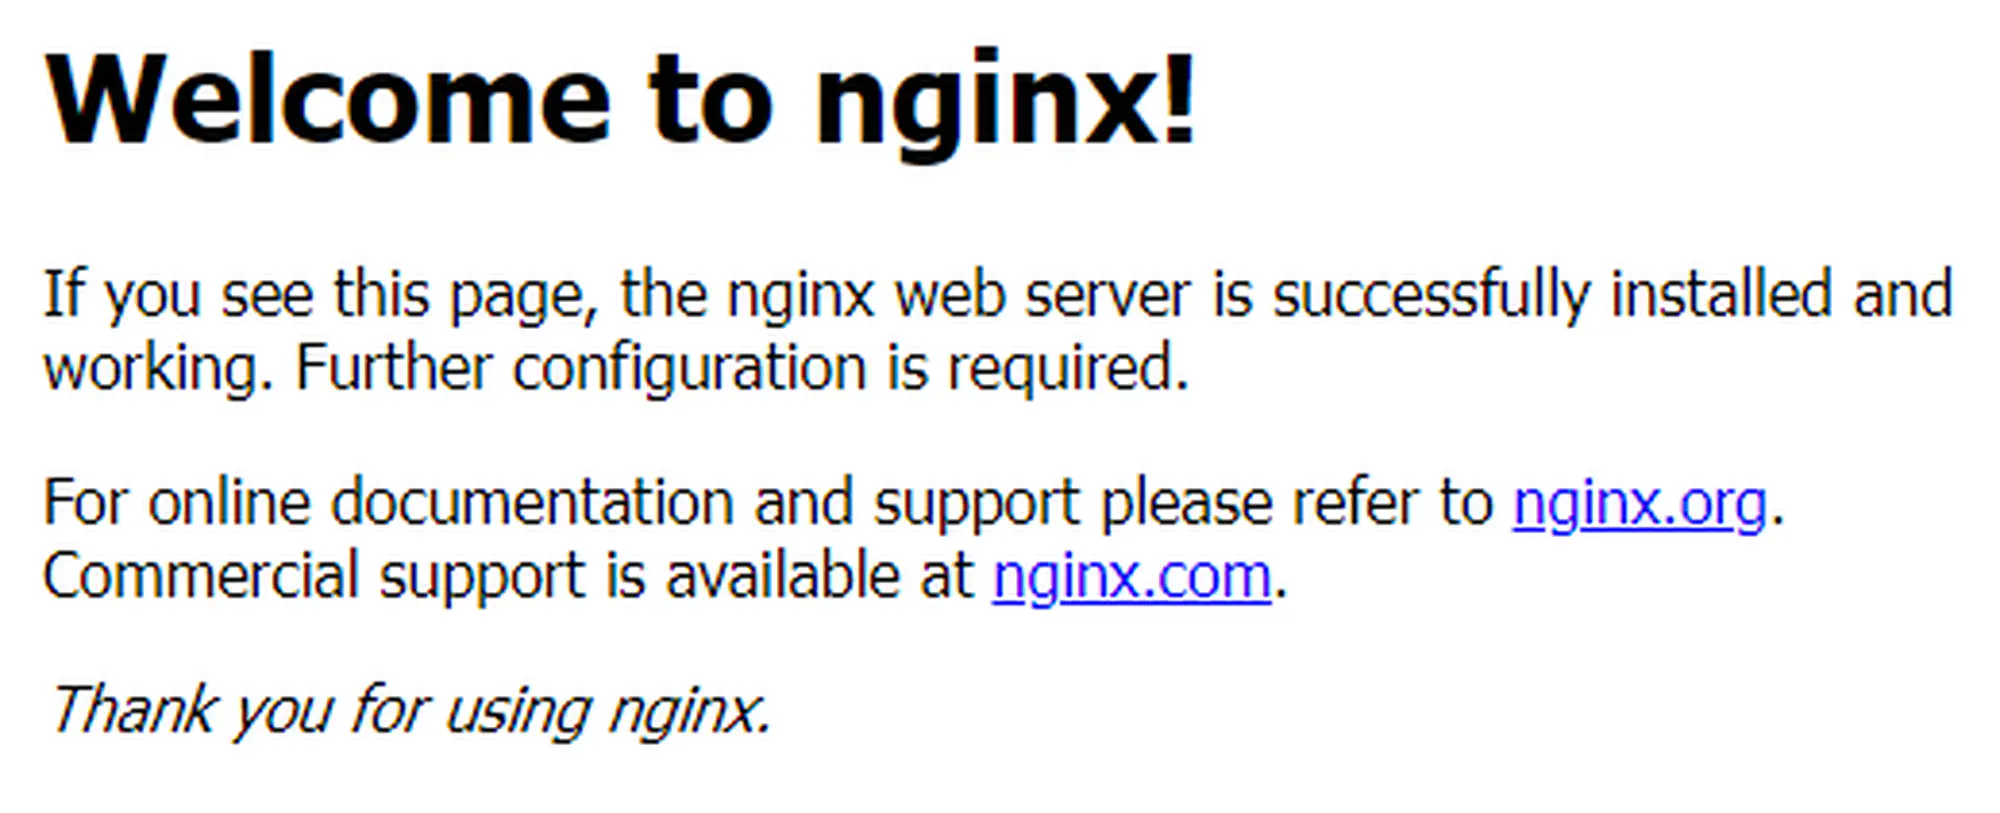
浏览器访问服务器能看到:
2
-
2 多站点配置
Nginx 和 Apache Httpd 一样,支持基于不同 IP 地址、端口、域名的多站点(虚拟站点)配置,本例采用基于域名的方式
具体步骤如下:
-
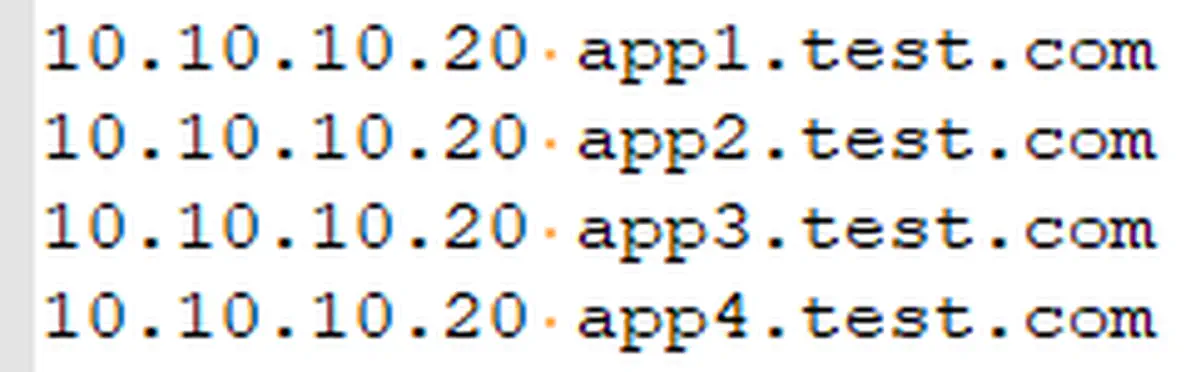
准备测试环境,修改本机 host 文件,解析域名至服务器
3
-
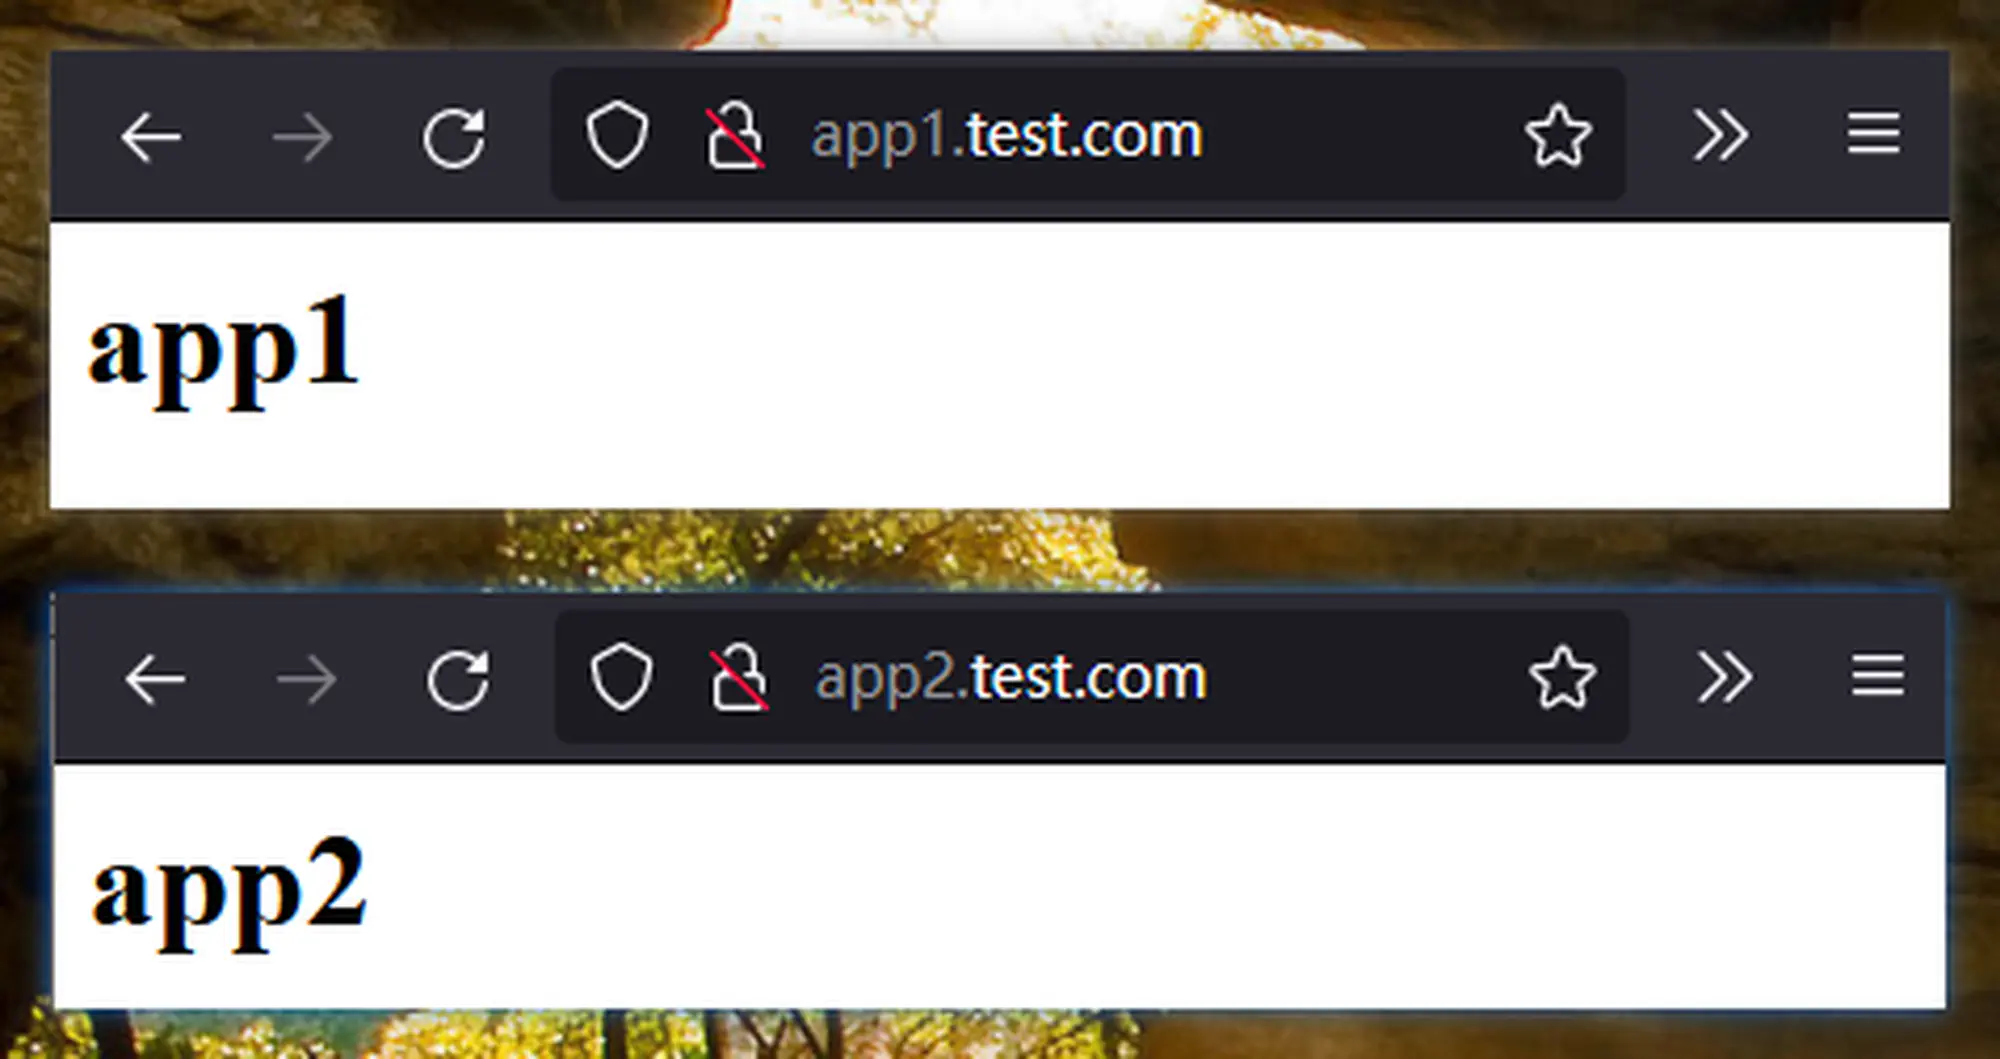
服务器上准备两个 web 应用(app1 和 app2)
-
 1
 2
 3
 4
 5
 6
 7
 8
 9
10
11
12
13
cd /usr/share/nginx ls cp -r html app1 cp -r html app2 ls app1 app2 html echo > app1/index.html echo '<h1>app1</h1>' >> app1/index.html echo > app2/index.html echo '<h1>app2</h1>' >> app2/index.html
-
-
编辑 Nginx 配置文件
-
 1
 2
 3
 4
 5
 6
 7
 8
 9
10
11
12
cd /etc/nginx/conf.d/ # 备份 cp default.conf default.conf.original # 清空 echo > default.conf nano default.conf #写入以下内容 # 重新加载 Nginx nginx -s reload #或重启 systemctl restart nginx -
 1
 2
 3
 4
 5
 6
 7
 8
 9
10
11
12
13
14
15
16
17
18
19
20
21
22
23
24
25
26
27
28
29
30
31
32
33
server { listen 80; server_name app1.test.com; #access_log /var/log/nginx/host.access.log main; location / { root /usr/share/nginx/app1; index index.html index.htm; } error_page 500 502 503 504 /50x.html; location = /50x.html { root /usr/share/nginx/app1; } } server { listen 80; server_name app2.test.com; #access_log /var/log/nginx/host.access.log main; location / { root /usr/share/nginx/app2; index index.html index.htm; } error_page 500 502 503 504 /50x.html; location = /50x.html { root /usr/share/nginx/app2; } }
-
-
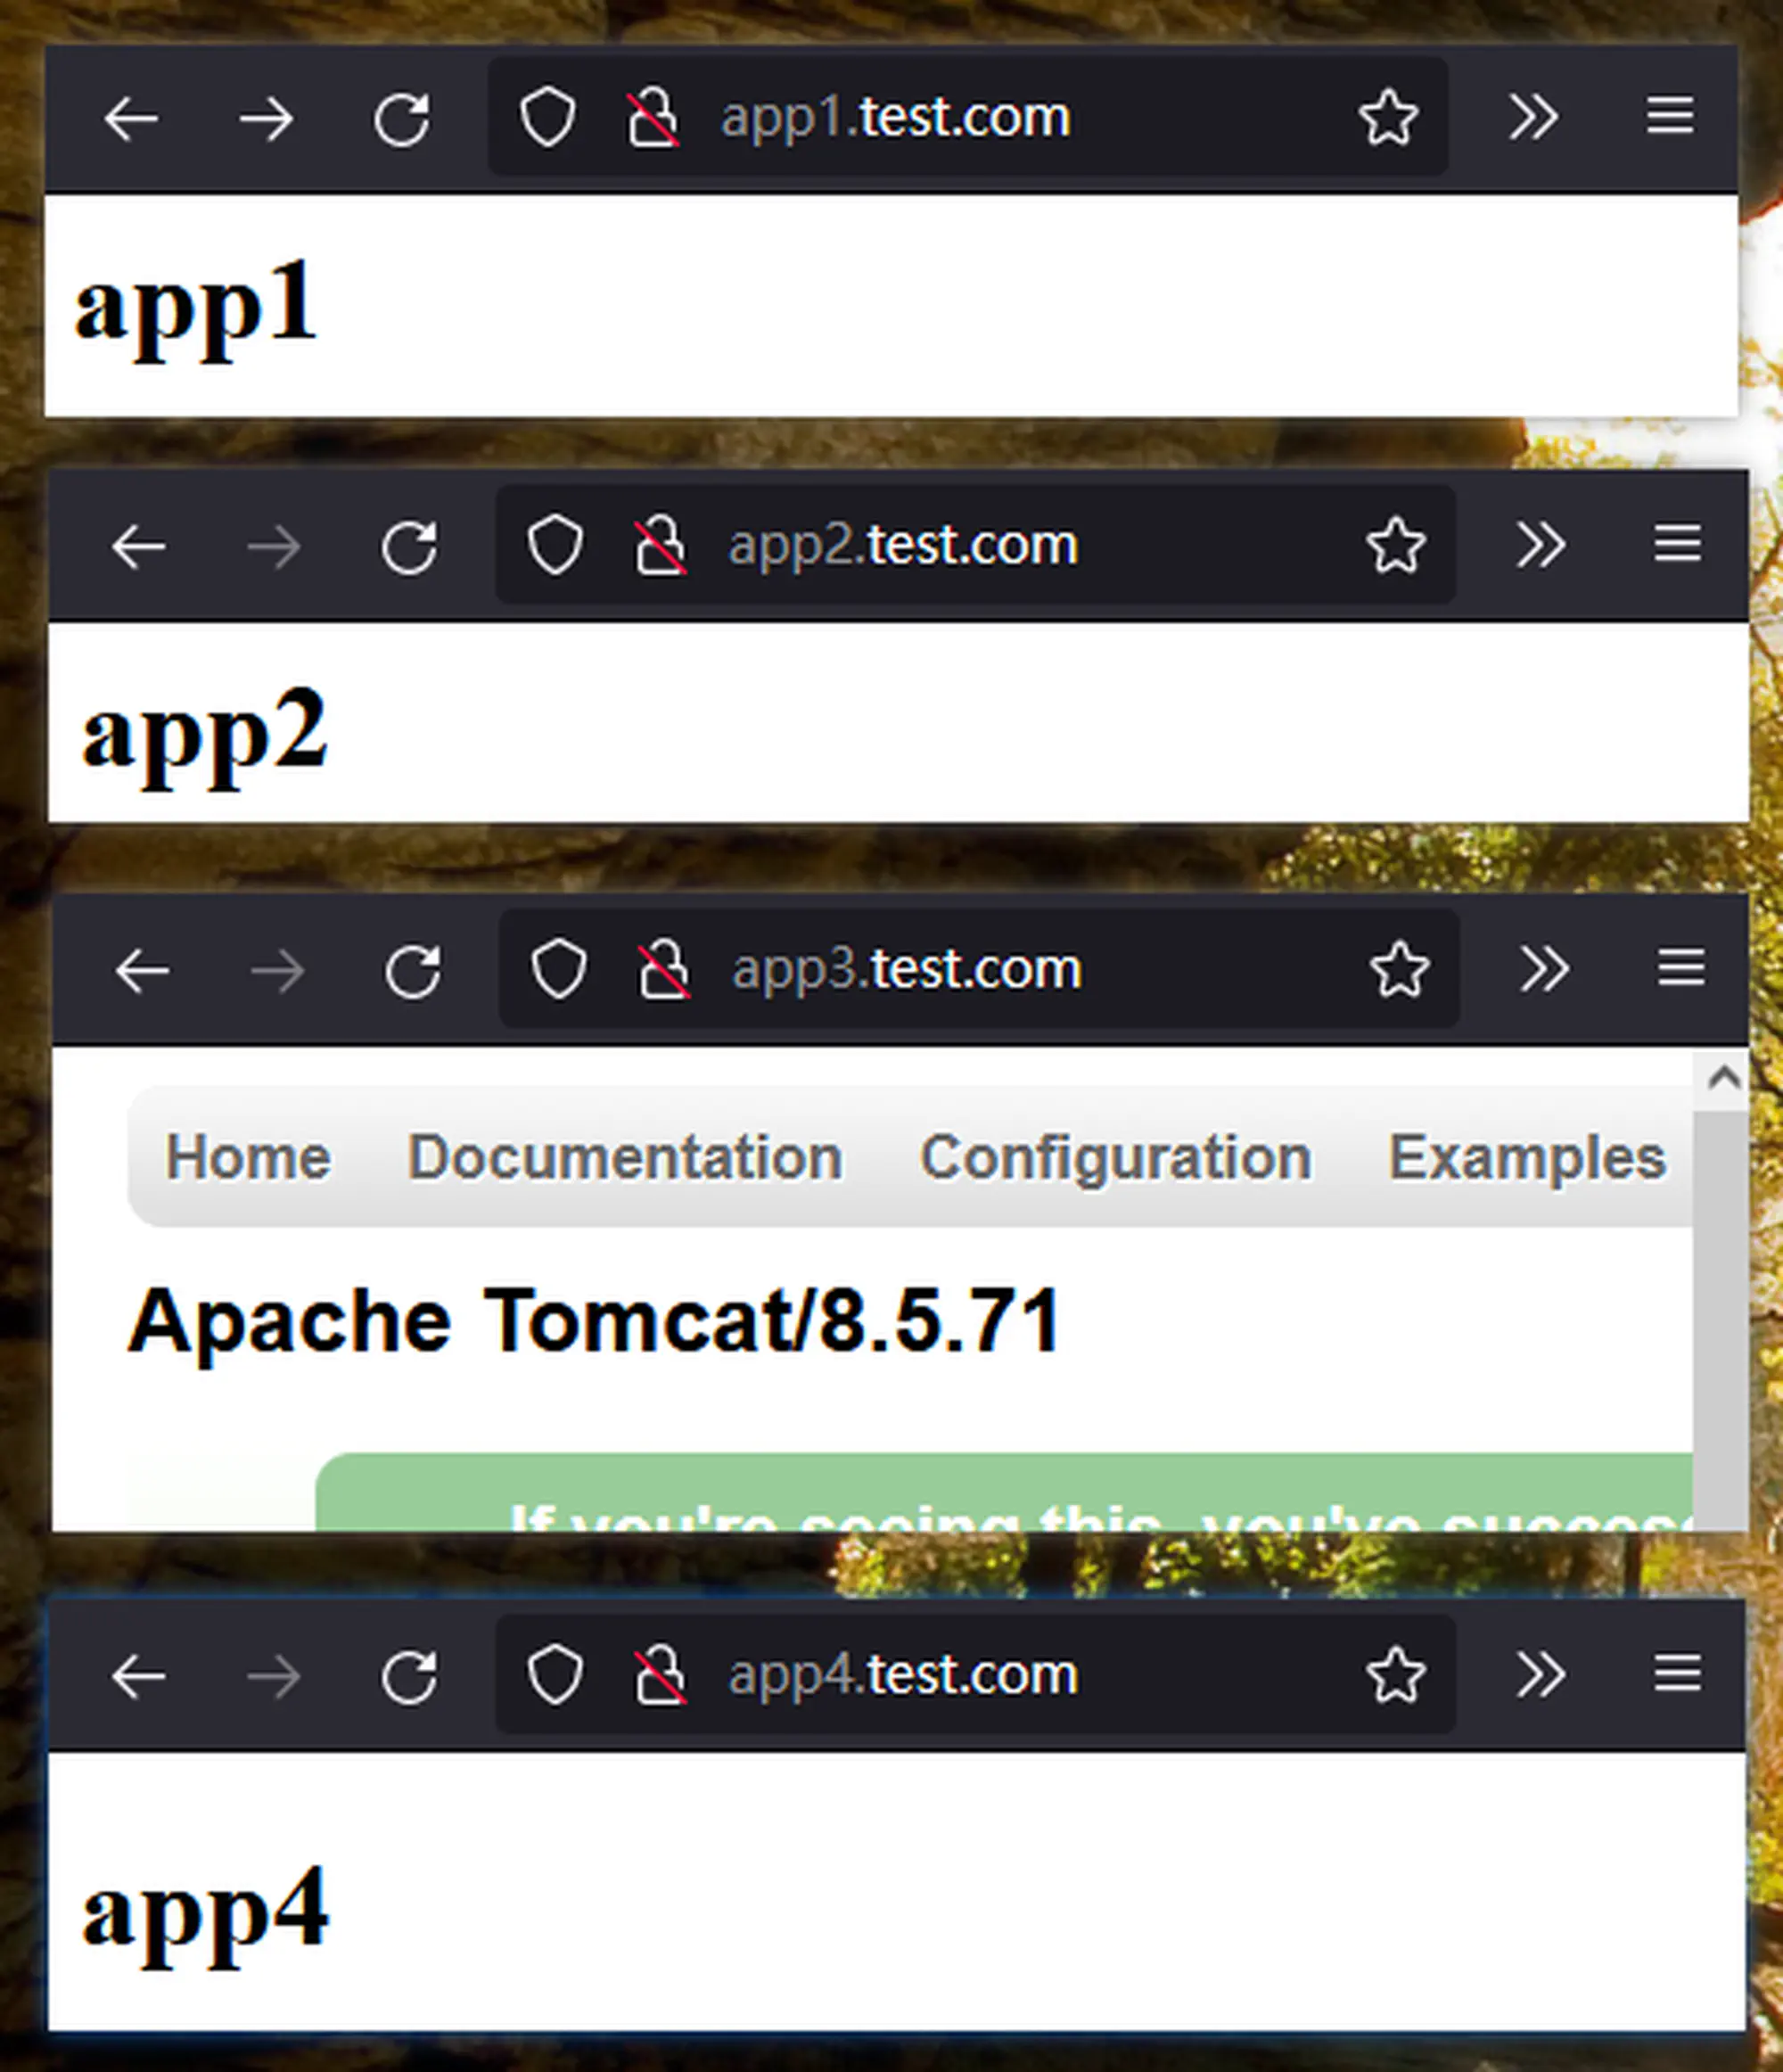
测试验证(浏览器访问)

4
3 反向代理配置
上面通过基于域名的多站点,实现了两个静态站点,下面再通过反向代理来实现:
- 将访问 app3 的流量转发给 tomcat 应用
- 将访问 app4 的流量转发给 springboot 应用
具体步骤如下:
-
准备一个 tomcat 应用
-
 1
 2
 3
 4
 5
 6
 7
 8
 9
10
11
12
cd ~ wget https://dlcdn.apache.org/tomcat/tomcat-8/v8.5.71/bin/apache-tomcat-8.5.71.tar.gz ls tar -xvf apache-tomcat-8.5.71.tar.gz ls mv apache-tomcat-8.5.71/ /usr/share/nginx/app3/ cd /usr/share/nginx/app3/conf cp server.xml server.xml.original nano server.xml #修改 tomcat 监听端口,如下: -
1
2
3
4
<!-- <Connector port="8080" protocol="HTTP/1.1" --> <Connector port="8083" protocol="HTTP/1.1" connectionTimeout="20000" redirectPort="8443" /> -
1
2
3
4
5
6
7
8
9
#安装jdk yum install java java -version #启动tomcat bash ../bin/startup.sh #防火墙放行端口(临时) firewall-cmd --add-port=8083/tcp firewall-cmd --list-all -
网页访问验证
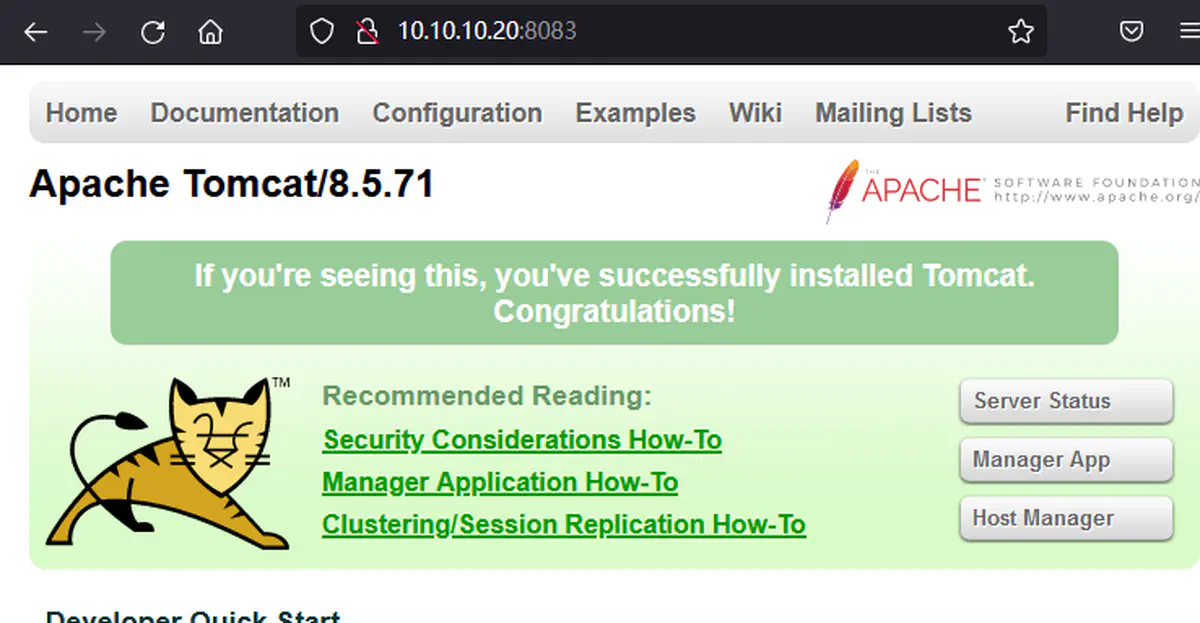
5
-
-
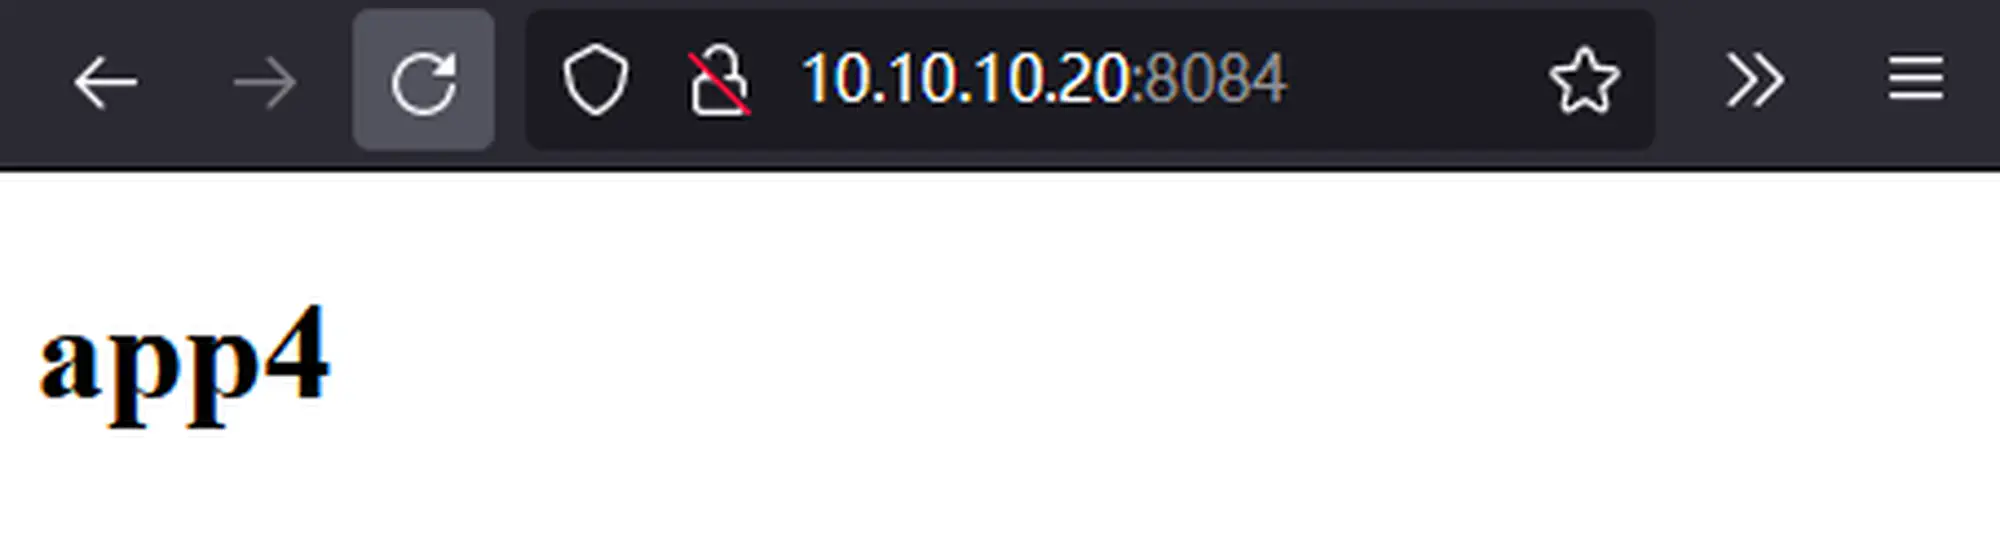
准备一个 springboot 应用(使用 8084 端口,代码过程略)
-
1
2
/usr/share/nginx/app4 └── app4.jar -
1
2
3
4
5
6
#防火墙放行端口(临时) firewall-cmd --add-port=8084/tcp firewall-cmd --list-all #启动springboot应用 java -jar /usr/share/nginx/app4/app4.jar -
网页访问验证
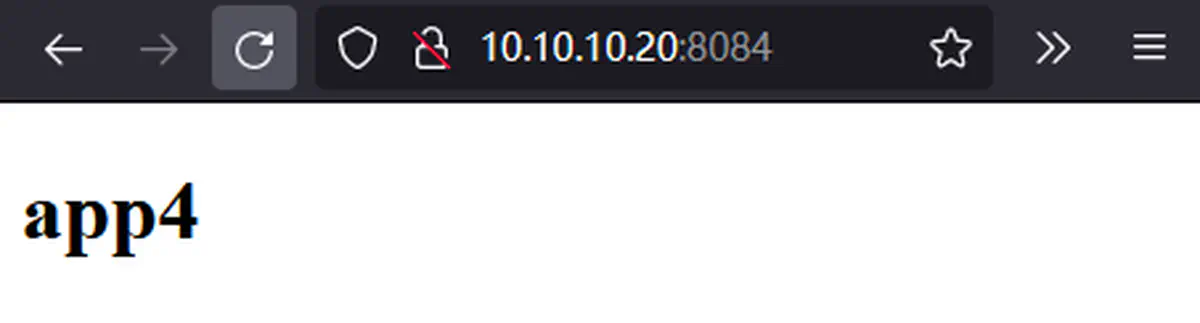
6
-
-
编辑 Nginx 配置文件
-
1
2
3
4
5
cd /etc/nginx/conf.d/ nano default.conf #编辑配置文件,添加如下内容 nginx -s reload -
 1
 2
 3
 4
 5
 6
 7
 8
 9
10
11
12
13
14
15
16
17
18
19
20
21
22
23
24
25
26
27
upstream app3 { server localhost:8083; } server { listen 80; server_name app3.test.com; location / { proxy_pass http://app3; index index.html index.htm; } } upstream app4 { server 127.0.0.1:8084; } server { listen 80; server_name app4.test.com; location / { proxy_pass http://app4; index index.html index.htm; } } -
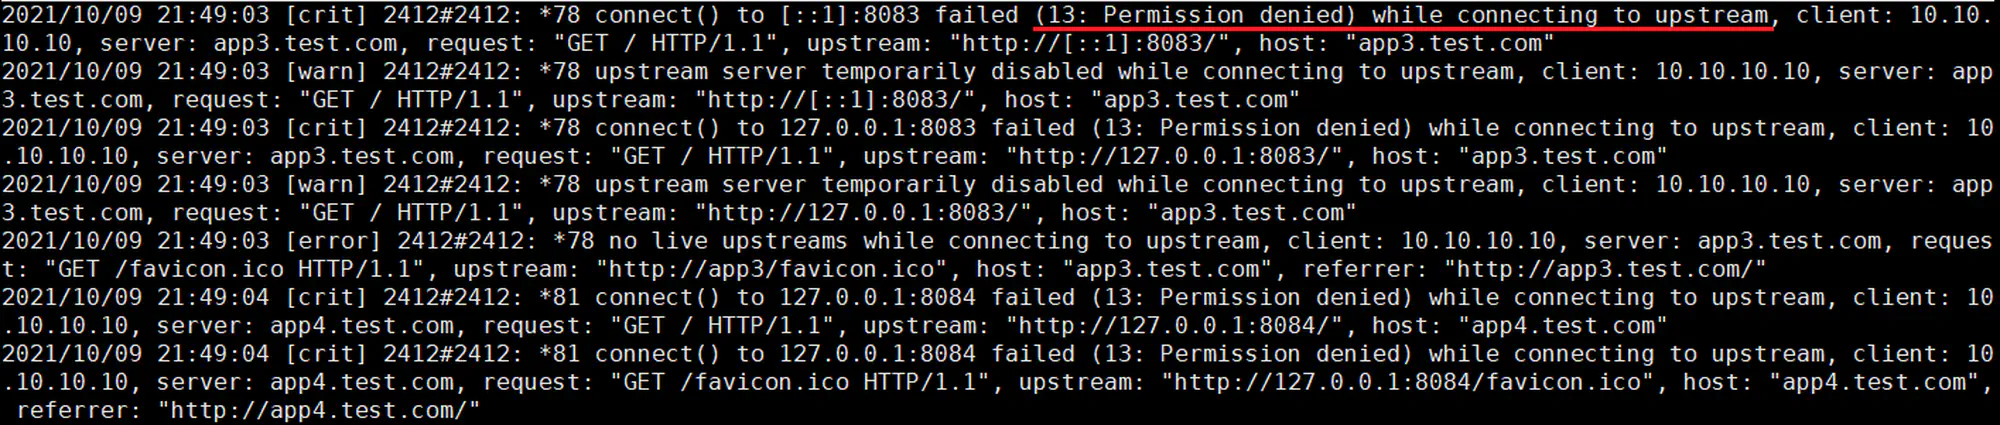
此时访问 app3.test.com 和 app4.test.com 会出现 502 问题
-
查看日志:
cat /var/log/nginx/error.log
-
-
测试验证(浏览器访问)

8